Fireplace Fixings


One of the greatest parts of winter is curling up in front of the fireplace on a cold snowy day. However, now that we are in the spring season, your fireplace may just seem like a useless waste of space, but it doesn’t have to be. Why not transform your fireplace for the new season and use it as a focal point for your room? Your fireplace is one of the greatest places to display antique treasures or fresh flowers from outside. It is very easy to create a unique fireplace that brightens up your space for the new season.

IMG_6595
A fireplace design I created. Although this isn’t a perfect design picture, it shows an example of some spring pieces you could use to brighten up your space.

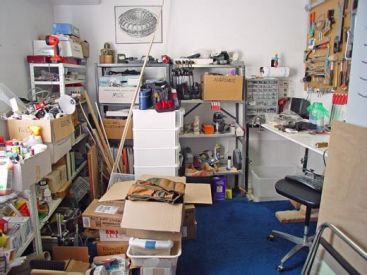
The first thing you should do is search through your home for really cool pieces. Check the attic for old windows or even antique picture frames. Check your basement for old bottles or vases. Check your bookshelves for old books to incorporate into your design. Once you have gathered your treasures you can begin to play with what you have and decide what would work well together for your space. This is also where you can decide if you want to purchase any additional items. (a great place to find fireplace finds is at garage sales or local thrift stores–don’t be afraid to make a quick stop at either to find old treasures that will surely make your fireplace unique).

1-1-1
An amazing spring fireplace design using many different unique pieces to create a beautiful focal point for the room. This design is from Worthing Court blog

When looking at actually putting your finds together there are a few tips you should follow:

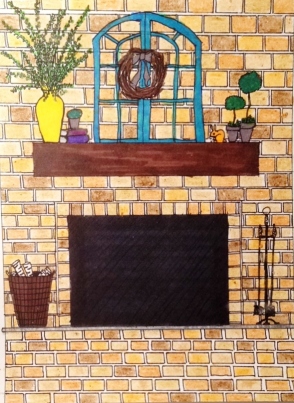
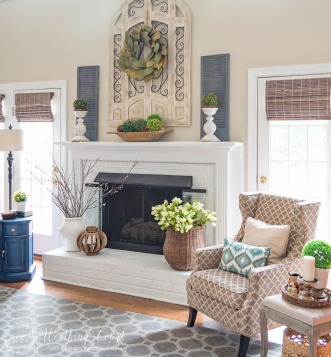
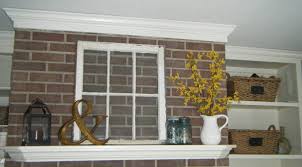
  1. Pick one large item for a centerpiece. It can be a window, a picture, a frame with a wreath, a clock, or even an old piece of metal with an interesting design–it all depends on what you love and what you have.
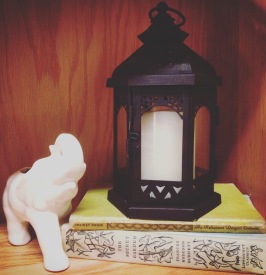
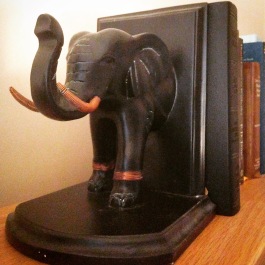
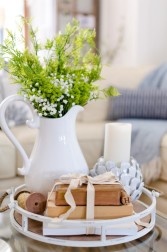
  2. The next step is to decide what pieces you have to go with your main focal point. This could be really cool glass bottles, lanterns, vases, candle sticks, plants, or even a small statue.
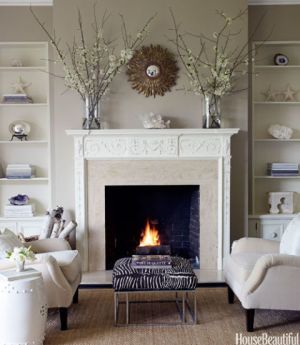
  3. The third step is to put it all together to create a fireplace masterpiece. When putting your fireplace together there are a few different techniques. You can create a symmetrical fireplace design with similar items on both sides. However, there is also the option to make it unsymmetrical, but have a design that flows nicely. The second option might take a bit longer, but play around with the items you have and see what design works best for your space. If you decide to go with a more creative design, finding a way to tie in the color you used on both sides can help with the flow of the layout. Another tip for this is to try to even out the size of the items across the mantle. You should try to avoid having all of the big items on one side and little items on the other side–this creates a fireplace that looks unequal and unfinished.
images (9)
A simply beautiful fireplace design created by Jeanette. (Check out her blog here!) This is an example of an effective fireplace design that doesn’t use symmetry. Notice the colors and the size of the items used here–creates a nice flow.
54c07984156c9_-_07-hbx-cozy-fireplaces-dhong-0511-xln
This fireplace design from House Beautiful shows the use of symmetry in a fireplace design. This can be a very effective method which will create a completed look for any fireplace.

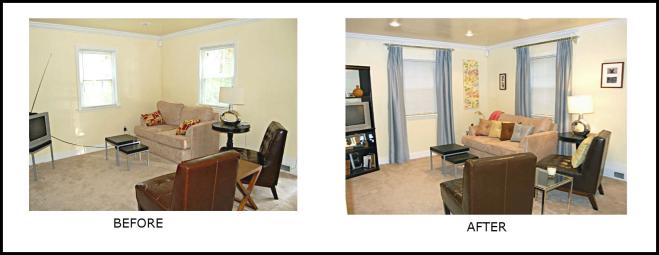
Creating a fireplace design for spring can be a very fun and rewarding adventure. It is a great time to find those special pieces you have laying around your space and put them all together to create a masterpiece. The process is not difficult and you will be amazed with how much a spring fireplace can brighten up a room and create unique focal point for your room. Good luck designing and happy spring!

If you have any questions for me please feel free to leave a comment and I will answer as soon as I can. If you have any ideas for me or my business or would like to share a picture of a space you need staged or have staged yourself, please feel welcome to do so :)

Don’t forget to subscribe to this blog and follow me on twitter (@StageYourSpace) to read my latest blogs and follow my journey.

“Your home should tell the story of who you are and be a collection of what you love” ~Nate Berkus

Fireplace Fixings

Stage your Space for Spring

A new season is upon us–Spring. With spring comes spring cleaning, blooming flowers, and a boom in the housing market. If you are one of the many who are listing their house to sell or just want to freshen up your space for the new season, I might be able to help you out with a few tips.Instagram-2-coffee-table-587x886

  1. The first (and most dreaded) step to preparing your home to sell or just for the spring season is cleaning. Removing the clutter from your home makes a world of difference. You will be amazed with what even an hour of cleaning can do. My suggestion is to go through your house and make a list of everything that needs to be done. Then start with the toughest projects and finish with the easier tasks. You have the most energy when you start cleaning–use it to your advantage!
    cluttered room
    A cluttered room looks messy and chaotic

    8195228.jpg
    A de-cluttered room with good organization creates a welcoming and fresh feel.
  2. Once your house is de-cluttered, you can move on to the second step–rearranging furniture or adding new pieces to your home. Without all of the clutter, your rooms will have a little extra space which will allow you to look at your room layout and perhaps find a new layout that will help freshen up your space. If you have a little extra money in your budget you could even find a few new pieces of furniture to exchange for some old pieces. This can make a huge difference in your space!staging-livingroom_with_border
  3. The third tip I have for you is to change up your room accents. Find a color scheme and stick with it. Too many colors is distracting and too few is cold (see my blog post on color). This is one of the best times of the year to add color to your home. Bright greens or purples are fun accents to use to transition your home into the spring season. Even adding a simple vase with some fresh flowers will bring a room to life. Rearrange-furniture---Jackson-Oct12

Even though the list is not huge, these three tips will make such a huge difference in your space. Although there are so many more things that go into selling a house, you now know how to get started. It may seem like a lot of work, but I promise the end product is worth it. Your Space will be ready for Spring in no time 🙂

If you have any questions for me please feel free to leave a comment and I will answer as soon as I can. If you have any ideas for me or my business or would like to share a picture of a space you need staged or have staged yourself, please feel welcome to do so :)

Don’t forget to subscribe to this blog and follow me on twitter (@StageYourSpace) to read my latest blogs and follow my journey.IMG_6569

Stage your Space for Spring

The Importance of Color

Today I am going to share with you my biggest pet peeve about home staging–over-neutralizing your house. One of the biggest tips for home sellers is to neutralize your home before putting it on the market. Realtors and home stagers suggest painting the walls a neutral color and avoiding bold statements. I, too, would agree that neutral colors are a safe and smart choice when looking to stage a house to sell, but I want to caution to not over-neutralize, making the whole house feel cold and bland.

To show what I mean by over-neutralize I found a few pictures from magazines and websites that (to me) seem to be too bland and cold feeling for a staged home.

Although some designers love white rooms, I personally find them blinding and  cold. This first picture from Houzz.com shows exactly what I mean by over-neutralizing.  Although this room has some nice features (love the nightstand), it is lacking color. Even just using different shades of grey or beige would help sell a house with this room.

e4016a5b0181cdc7_9055-w500-h400-b0-p0-traditional-bedroom
White room from Houzz.com

Another example is this grey room. Although I am the biggest fan of grey (seriously, it’s my favorite color), this much grey is too much. Even though the room has a great industrial design and has a red chair giving the room a little color, a home buyer viewing this would probably see this as cold. Adding color will add warmth to the room and help sell this a lot faster.

dark-grey-wall-panneling-and-white-book-shelve-and-over-grey-sofa-and-white-grey-cushion-and-black-simple-coffee-table-and-unique-floor-lamp-and-unique-swivel
Grey living room picture from sardng.tk showing a complete lack of color

Now imagine if you used the same couch and furniture, but you added different pillows to the couch with red patterns, if on the coffee table there were a glass container with bright red apples. Imagine a unique giant clock on the wall. See the silver vases just sitting on the bookshelf? Now imagine them filled with red flowers? Before long the accents of color and the addition of a few warm elements (pillows, rug, throw blankets, plants) will create a much homier feel which would make this room so much more appealing while also keeping the industrial look.

To show you the difference a little color can make, I also found a few pictures of rooms that use color as an accent and it makes a world of difference.

livingroom-graphicsfairy2
Although this room is grey the use of an accent color really breaks up the blandness of the room and creates interest and warmth (I also love the symmetry here). Photo courtesy of the Graphics Fairy
11-kitchen-less
This kitchen has beautiful cabinets and using an accent color like yellow really helps bring out the rest of the room. Photo taken from This Old House, photographer: Anthony Tieuli
9d559acfb6dd381be5452076cd689aed
Even using brown as an accent color is better than no accent color at all. Photo courtesy of West Elm

I hope you can now see how important color is when staging a home. If you have too much color in a room (or your colors are too bold) the room can be overwhelming and can have the same effect on a buyer as a room with no color. A room with no color will not feel warm and buyers may have a difficult time feeling at home there. However, if you use neutral colors throughout the home and use corresponding accent colors to create warmth and visual interest, buyers will feel at home and will feel a stronger connection to the house. It’s all about how you stage your space.

If you have any questions for me please feel free to leave a comment and I will answer as soon as I can. If you have any ideas for me or my business or would like to share a picture of a space you need staged or have staged yourself, please feel welcome to do so 🙂

Don’t forget to subscribe to this blog and follow me on twitter (@StageYourSpace) to read my latest blogs and follow my journey.

The Importance of Color

Dorm Room Do-over

IMG_5309Happy Leap Year!

What better day to share my first project with you. As mentioned in my first blog post I am a college student working towards my acceptance into PA school. Now, if you have any idea of what college is like, you probably know how small the dorm rooms are (I mean tiny)–imagine what it would be like to live in a white, cinder-block refrigerator box. I was blessed with my own room, but that doesn’t necessarily mean it was any bigger than your average dorm room. Although some might say this is cozy and it’s all part of college, who says you can’t have a little fun with the layout and design? When I unlocked the door on the very first day I was almost blinded by the blank space (or lack of space) surrounding me. IT WAS NOT GOING TO WORK. So I got a little creative 🙂

With limited resources at my fingertips, I had to do a quick survey of everything I brought with and decide what would be absolutely necessary for me to purchase to give the room a finishing touch. Luckily, I packed last minute (meaning I over-packed) and had more items to work with than I originally thought.


IMG_5047
My Reading/Study nook.

To begin, I raised up the bed (not all the way, but
enough to create usable floor space). Then I spread out a soft gray rug I found at Target for under $20 to warm up the space, I added white twinkle lights (to create the perfect study lighting while also brightening up the space), and then I added the final touch–pillows. Over summer one of my projects was to figure out how to make throw pillow covers using inexpensive fabric from the store. I ended up with 4 different covers, and two pillows to use in my decorating. I created the perfect study space and reading nook that was warm and cozy while also utilizing the otherwise unused space underneath the bed.

IMG_6338
Focal point on my bookshelf created from a mix of old and new treasures.


Once my study nook was finished, I started unpacking my desk items. Once my books were in their place and my pens were in their holder I had a little fun creating focal points on my bookshelf that represented who I was. Anybody who walks into my room instantly knows I am an elephant lover because many of my spaces features a unique elephant feature.The photo to the right shows an elephant planter from my grandma (which now houses a beautiful Jade plant), grouped with two antique books from a local thrift store, and my favorite bohemian lantern. The candle in the lantern is on a timer and it flickers every evening setting the

IMG_6337
My favorite Rummage Sale find: $4 Elephant book ends with copper wire tusks and bands.

perfect mood for some late night reading. On the very top of this bookshelf is one of my favorite summer rummage sale finds,which had to be front and center. This summer I started collecting more bohemian pieces and the one item I wanted more than anything else was elephant book ends. The last weekend before school my mom and I took a new route to my grandma’s for whatever reason, and there on a corner was a tiny garage sale with less than 15 items for sale–of course there were the coolest elephant book-ends ever and I scored them for $4 (another reason I love thrifting).

Once my desk and bookshelf were completed, the next order of business (the fun part), was to make the bed and decorate the surrounding walls. I used the same grey comforter from the previous year (also a Target find) and placed the rest of my pillows on top. For the walls…On the wall next to my bed I taped a huge bohemian tapestry (PSA: 3M tape works amazing for hanging tapestries). Then I bought a simple world map and hung it above my bed and used some dollar store frames of different, but complimentary designs to hang a few pictures around the map. Next to my bed I put the filing cabinet I re-purposed (blog post coming soon) as a nightstand. On that went my simple silver and white lamp, my metal “A”, and of course a small elephant statue.

Throughout the school year I have altered a few things and have added a few new rummage sale finds to my collection, but overall my original design still stands. The image below is the finished product, although a few of the wall decorations mentioned are not present here. This is the first room I was really able to decorate myself and it has brought me great joy and comfort thus far. Can’t wait to design more spaces in the future! IMG_5055

If you have any questions for me please feel free to leave a comment and I will answer as soon as I can. If you have any ideas for me or my business or would like to share a picture of a space you need staged or have staged yourself, please feel welcome to do so 🙂

Don’t forget to subscribe to this blog and follow me on twitter (@StageYourSpace) to read my latest blogs and follow my journey.

Dorm Room Do-over

The First Step is the Hardest

12714459_1105756819446357_429405342_n (1)

Hey there,

Before I share a few of my findings and ideas about staging, I think it is only fair that I share a few things about myself. Don’t worry, I’ll keep this short. My name is Anne and I am on my way to becoming a Physician Assistant. Now you may be thinking, “medicine and home staging are nothing alike,” and you would be right; however, I am not just an aspiring PA. I was born a dreamer and as I have matured, my love for creativity and interior design has matured as well. Let me tell you a story…..

A year ago as I was adjusting to the start of a new semester, an idea occurred to me that was so brilliant it could not be ignored. This idea has only evolved and developed into a dream of mine that I, someday, will make a reality. My dream is to create a staging business. Now, I know there are countless others who have already done this, but my dream is bigger. I don’t just want a business to stage houses to sell. That is only the beginning of my dream. I want my business to share the passion, the creativity, and the determination to create something amazing out of very little. My business will be called Stage Your Space (as you have probably guessed). I am going to not only offer home staging for selling your home, but also staging for when you move into a new space. I want to help people find the colors to paint the walls, the type of furniture to use in odd spaces, and how to make a few simple changes with pieces they already have that will make the world of difference. But, my dream doesn’t stop there. I want to teach people by bringing them into my business space and showing them (by example) the differences color, shape, and layout can make when looking at a space. I want to hold seminars to show people that upstaging your bathroom can be done for under $75. I want to show my clients how to do DIY projects, instead of just leaving instructions for them to follow. I want to be a teacher, a leader, and an inspiration to those looking for a little (or a lot of) change in their home and life. However, until I can start my business I have decided to create a blog to combine DIY projects I make, pictures of cleverly designed spaces I come across, and ideas I come up with to successfully stage a space.

So now you know, I am just a college student with a lot of ideas that I am determined to bring to life. It has taken me awhile to figure out how to start on my journey, but now that I have taken this first step, I hope you will join me and help me grow as a designer.

Thanks for reading!


If you have any questions for me please feel free to leave a comment and I will answer as soon as I can. If you have any ideas for me or my business or would like to share a picture of a space you need staged or have staged yourself, please feel welcome to do so 🙂

Don’t forget to subscribe to this blog and follow me on twitter (@StageYourSpace) to read my latest blogs and follow my journey.


The First Step is the Hardest